Showing posts with label food. Show all posts

Tuesday, November 1, 2011

Party like it's 1802

I picked up The Bucolic Plague (the book, not a disease) at the library not intending to enjoy it. I take that back. It wasn't that I was planning to read something I thought would bore me to tears, it's just that given the subject matter and the title, I just figured it was long-winded story of how you, too, can be a better person by buying and running an organic farm. I loved the book! Yeah, it has undertones of the trials and tribulations one may encounter when embarking on the task of becoming a gentleman farmer, but it is really a very well written and quite funny story of real life on a small farm.

I remember seeing the book in my local Williams-Sonoma back in the spring. Then earlier this week the Beekman Farm popped back on my radar when I was glancing through the recent issue of Country Living.  The Fabulous Beekman Boys are two guys from Manhattan who purchase a farm in upstate New York, and then commit to bringing the run-down farm and house (built in 1802) back to life. The book turned out to be very funny, regardless of whether or not you care about such things as heirloom plants or organic farming or killing your first Thanksgiving turkey with your bare hands. I really loved the tidbits that were planted throughout the book, which provide an insider's glimpse into the "real" Martha Stewart  (Brent Ridge, one of the two men, is a former Martha Stewart Omnimedia employee). I will spare you of my lame attempt to highlight some of the humor and the charming tales of life down on the Beekman Farm, but it's worth your while to read an excerpt of the book here. Farming eventually lead Josh and Brent to develop a very Martha-style omnimedia empire, developing a lifestyle brand called Beekman 1802 which includes the website, books, blogs, forums, and a TV show.

Beekman 1802 
The Fabulous Beekman Boys have recently released a cookbook of  heirloom recipes, The Beekman 1802 Heirloom Cookbook. The recipes focus on using heirloom produce and organic ingredients, giving home-cooking a 21st century farmhouse spin. And, just in time for Thanksgiving, some of their recipes were featured in this month's (November 2011) issue of Country Living magazine.


One of the recipes featured in the magazine was a Honey Apple Pie with Rosemary. I love rosemary and I love apple pie, so I thought I'd give it a whirl. Since the recipe isn't posted on the Beekman site or the Country Living site, I can't (unless I want to get in sued) post the recipe here. After a little "internet research" I found that their recipe was VERY similar to this recipe (which I can post and link to since it's already been posted):

Honey Apple Pie with Thyme originally posted back in 2006 in the New York Times.


3 golden delicious apples, peeled and cored
4 granny smith apples, peeled and cored
1/2 cup honey
6 thyme branches
1/2 cup unsalted butter cut into small pieces
2 T instant tapioca
1/3 c light brown sugar
1/2 t ground ginger
1/4 t salt
flour for dusting
dough for 2 9 inch pie crusts.


1. Preheat oven to 425 degrees. Slice Golden Delicious apples and 3 granny smith apples into sixths.
2. In a large skillet over medium-high heat, bring 14 cup honey to a boil. Let simmer about 2 minutes, until honey is caramelized. Add 3 thyme branches. Arrange half the apples in a single layer in skillet. Sprinkle 2 tablespoons butter over apples. Cook apples, turning until well caramelized on all sides, but not cooked through, about ten minutes. Scrape apples and honey mixture into a bowl. Add tapioca and toss to combine. Repeat cooking process with remaining honey, thyme, butter and sliced apples. Add a second batch of apples to bowl, combine. Discard all thyme branches.
3. thinly slice remaining granny smith apple and add it to bowl. Stir in sugar, ginger and salt
4. On a lightly floured surface roll out both crusts to a 12 inch circle. Place one crust in 9 inch pie plate. Scrape apple filling into crust and top with remaining crusts.
5. Bake for 15 minutes, reduce heat to 350 and continue baking about 45 min. Let cool for 30 minutes before slicing.

So, taking that recipe, here are my changes to make a Honey and Rosemary Apple Pie...

Crust
I didn't make the crust. If you want to make a pie crust and have time, go for it. I used a store-bought crust.

Pie Filling (this is enough to make one deep dish 9 inch pie or two regular 9 inch pies)

4 Granny Smith apples, peeled, cored, sliced
4 Honey Crisp apples, peeled, cored, sliced
1 cup light brown sugar
2 teaspoons cinnamon
1 teaspoon ground nutmeg
½ teaspoon ground cloves
2 teaspoons finely chopped fresh rosemary (I will probably use 3-4 teaspoons of rosemary next time...it wasn't rosemary-enough for me)
3 tablespoons instant tapioca
½ cup honey
2 tablespoons butter
1 large egg, lightly beaten with 1 teaspoon water (this is the egg wash for the top of the crust)
Cinnamon and sugar (for sprinkling top of pie crust)


In a bowl, combine apples with brown sugar, spices, and tapioca.  


Add honey and stir until combined.


Preheat oven to 400. Place crust in 9 inch pie pan. Add pie filling to pan. And dot with 2 tablespoons of butter (not melted).

Place second crust over top of pie. I have a leaf-shaped cookie cutter that I like to use to cut out the crust for the top of the pie.

Brush egg wash over crust, sprinkle with cinnamon and sugar.


Bake pie on middle rack of oven .After 20 minutes remove pie and cover edge of crust with foil. Continue to bake until juices are bubbling 50 minutes more. Cool on wire rack.


The pie was fantastic! I loved the addition of rosemary, even if it wasn't enough rosemary for me. I'll play with it on the second try to see if I can add more rosemary without over-doing it.

Thursday, October 27, 2011

Street food

The street food trend just keeps growing. Everywhere I go, or look, there is news of a new food truck or a restaurant specializing in street food. Over the weekend, I went to Paladar in the Annapolis Towne Centre at Parole (primarily because there was a sign advertising a Rum Bar and I've had a cold and sore throat for over 4 days now and rum seemed appealing).

A dark and stormy should fix things!

The restaurant has a happy hour menu that features "Latin street food"...which is sort of a mix of all kinds of things that may not be actual "street food", but it's cute that they're catering to a trend. The black bean empanadas I had, along with an entire bowl of gucamole, were delish!

So on this topic of being surrounded by "street food" wherever I seem to go, I was in The Fresh Market recently and spotted this:

Lucini Cinque e' Cinque
Now even the pasta companies are joining the bandwagon. It sounded intriguing so I thought I'd give it a whirl. I've had other products by Lucini and they were all very good, so I figured this wouldn't be a bust. Of course, I first had to Google the word farinata to see what exactly I  purchased. It was described as a flat bread made of chickpea flour and is common in Italy, as well as southern France (where it is called socca). And as a logical next step, I searched Pinterest for posts containing the word farinata or socca. Most of the recipes used the baked farinata as a base for creating a sauce-less pizza.

This is what I did with mine:

Just one quick not about preparing the farinata...the directions have you placing the pan (I used a round metal cookie/pizza pan--with sides) in the oven first and then while it's hot pour the batter into the pan. Be very careful doing this. The directions don't mention that you might burn yourself as the batter sizzles when it hits the very hot pan. And make sure you pull the hot pan out of the oven and place it on a flat heat-resistant surface.

So here it is straight out of the oven (ignore the burned edges on the far side of the pan, we can blame that on my oven/me chasing a toddler around while it was baking and not being good about checking the oven). While it was baking I lightly sauteed a zucchini and some sun-dried tomatoes with pancetta.


Then I topped my farinata with the veggies, sprinkled it with parmesan cheese, and fresh ground black pepper (which was suggested in other recipes and on the package).

Very tasty and apparently good for you too!


Definitely give it a try if you spot it at the grocery store. The Fresh Market carried the rosemary (which I used) and a traditional variety, but a fiery Tuscan chili option is listed on the website. Buon appetito!


Tuesday, October 25, 2011

Tasty Cake

I've been avoiding this cookbook for an entire year. I avoided it at Barnes & Noble. I avoided it at the library. And then I caved. It's Fall and I'm all in my crazy Fall cooking and baking mode, so I couldn't resist.


It's a great book of southern-inspired desserts with a modern twist here and there. I need to make a point to visit Baked (FYI don't click that link if you're starving...it will be the end of you) next time I'm in NYC.

There is a Sweet & Salty Brownie recipe I want to try. And the Buttermilk Pie. Be glad I don't have a photo of the Double-Chocolate Loaf with Peanut Butter Cream Cheese Spread. Then there are the Marshmallow Chocolate Cups. See...there is a reason I was avoiding this book!

So I wanted to try the Burnt Sugar Bundt Cake with the Caramel Rum Icing because I haven't made a bundt cake in a long time and thought I'd like to give it a whirl again. Amy Atlas posted the full recipe on her blog back in January. I won't go through a step by step, but I did take some photos of my progress.

If you had smell-o-vision you would know that this batter smells like the buttery-est cake you have ever imagined. You could could just make this batter and set it out as an air freshener.

In the recipe, they say to "pour" the batter into the pan. That's not happening. It's insanely thick, so you just have to spoon it into the pan and then spread it out.
Now, let's take that extremely buttery, sugary cake batter and heat it up! Now the entire neighborhood is going to smell like the most delicious smelling cake you've ever imagined. 
In my highly dysfunctional oven, it took this behemoth an hour to bake. And then I had to let it cool over night before I could even think of getting it out of the pan. The next morning it popped right out!
I definitely suggest making the caramel shards for the top of the cake. Not only are they a cool decoration to the top of the cake, they add a nice crunch too. I didn't have a silpat, as they suggest in the recipe, so I just used a piece of parchment paper (I was afraid to use wax because I thought since you're pouring boiling sugar onto it, the wax might meld into the sugar and that would be gross.
So, here is the final cake! The icing was very runny because I set it out to warm up a bit (I made it the night before while I was baking the cake), while I was getting ready for work. By the time I got ready, after chasing around a 2 year old, it was not as chilled as it should have been so it ran down the sides of the cake. That is totally my fault. If you make the icing according to the recipe, it turns out nice and thick and would spread as perfectly as it is shown in the photo in the book (and on Amy Atlas' blog).


I know better than to keep something like this around the house, so I took it into work to be tested by my official taste-testers. I had tons of compliments and about ten people told me it was the best cake they ever had. It was really good and definitely something I would make again for a special occasion, but it's not a quick cake to make with making the burnt sugar syrup, then the batter from scratch, the baking time, making the icing, the caramel sugar shards, and then assembling the whole thing. In other good news, they do sell some of the Baked cake mixes (but not this one) at Williams Sonoma if you're interested in trying something but don't have half your life to devote to it.  And while you're over at Williams Sonoma please also notice that they're now selling a SWEET POTATO BISCUIT MIX!!!!!!

Friday, October 14, 2011

Fall Dinner

I just thought I'd share a few recipes I used over the past weekend when we had friends over for dinner. Two are new and one is an oldie, but a goodie!

SMOKED PAPRIKA PORK


I tried the Smoked Paprika Pork Tenderloin recipe that was in October's Southern Living magazine. I highly recommend it! Using the grill made things much easier than doing this in a crockpot or the oven, which is why I selected the recipe in the first place.

My adjustments to the recipe are:
I used garlic powder in the rub instead of a crushed garlic clove.
I added wood chips to smoke things up in the grill.
I skipped tying the tenderloin up with string and it was fine. I don't think you cook it long enough to encounter an issue of the meat starting to fall away (and it's not on the bone to begin with...maybe these people just like tying things with string?).
I also didn't make the BBQ sauce. I had some sauce from 12 Bones (in Asheville, NC) so I used that. I'm pretty sure any brown sugar based BBQ sauce you have or buy will be fine.

Tying things with string for no reason....making your own BBQ sauce...really people? I don't have time for that.

SWEET POTATO CASSEROLE
I also thought I'd share my sweet potato casserole recipe, since friends often ask for it. The problem with those requests is that I don't really use a recipe. I mean, I think I did in the beginning, but now I just sort of make it up as I go along. Here is the closest thing to a real recipe with measurements I could find.


Here is my Amy-style recipe:
1. Wash and cut into half about 6-8 sweet potatoes (you want enough mashed sweet potatoes to fill about half of your casserole dish)...so you get about 4-6 cups of mashed sweet potatoes. If you cook too many, then you have some left to make sweet potato brownies!
2. Cook them in boiling water for about 20 minutes or so, until they're soft and the skin is loose but not coming off in the water
3. Drain them and let them cool, then remove skins and mash them
4. Whisk together two eggs. Add some vanilla. Some sugar if you want. You can add some milk too. Then start mixing in the sweet potatoes. I usually add some cinnamon and maybe some nutmeg.
5. Grease a casserole dish. Spread out the sweet potato mixture evenly.
6. In a separate bowl mix together about 2 cups of chopped pecans (you want to cover the entire top of the sweet potatoes in the casserole dish so you'll need this much), a cup of brown sugar, about 2 tablespoons of all purpose flour, some cinnamon, ground cloves, ground ginger (maybe a teaspoon of each depending on how "spicy" you want it). Then melt a stick of butter and pour it into the nut mixture until it's fully incorporated. Spread the nut mixture over the top of the sweet potatoes in the casserole dish.
7. Place in oven at 350 and cook for about 30 minutes. Until the edges are starting to brown. Just check it occasionally. You don't want the pecans to burn.

If you want to add the marshmallow on top, and I do this sometimes, I just buy the plain mini marshmallows (I do want to try spreading a layer of marshmallow fluff on top one time!). Sprinkle the marshmallows on top of the cooked casserole and put it back in the oven under the broiler for a few minutes. You really have to keep a close eye on the casserole under the broiler because the marshmallows burn quickly and you want them just lightly browned on top.

'SMORES
I saw this recipe on Pinterest last week and thought I'd give it a try, but I'm not making marshmallow fluff or my own graham crackers. So I bought a jar of marshmallow fluff and a box of graham crackers. They now sell graham crackers in boxes with four sleeves instead of two and the graham crackers are already broken into squares, instead of rectangles. This was a HUGE break-through (thank you square graham cracker inventor) when it came to making these things a snap. You don't have to worry about breaking the graham crackers yourself, which will for sure end up in a mess and a bunch of broken-in-the-wrong-way graham crackers.

So, I just laid 8 crackers out on a cookie sheet. Spread marshmallow fluff on one side. Put another cracker on top and lightly pressed it together. I put those in the freezer for an hour or so. Then I came back, melted my semi-sweet chocolate chips (I did it in the microwave which works just fine, but you have to heat it carefully only a few seconds at a time and then open the door and stir the chips...then do that over and over again until the chocolate chips are fully melted and the chocolate is smooth) in a tall glass container (a pyrex measuring cup). I wanted something tall so the chocolate would be deep enough to dip the graham crackers straight down into and back out. Then I dipped them, and put them back on the cookie sheet (lined with parchment) for about an hour. After that I removed them and put them in a plastic air-tight container in the fridge. Unfortunately, I don't think the store bought graham crackers will last two weeks in the fridge like the original recipe suggests. I made them the night before and used them the next day and they were fine, but by the second day the graham crackers were starting to get soft, so I'd just suggest making them the night before or the day that you need them. They were really good!


Monday, August 1, 2011

Bacon Jam

You wanna know what's awesomesauce? Bacon Jam, that's what. Literally. I've been meaning to post about this incredible recipe and then Young House Love posted a Pinterest challenge for Tuesday. Of course, they do this the weekend I'm going to be out of town, so I can't even submit a cool crafty project. However, I believe Bacon Jam will more than suffice. It is possibly the most awesome thing I've ever cooked. Ever. So here is my project for the Pinterest challenge.

From Young House Love

I found the recipe on Pinterest a week or so ago. If you know me, you know my love of bacon. I've made candied bacon. I've made chocolate chip cookies with bacon (will post that soon). I've made pancake muffins with bacon in them that you dip in maple syrup. My love knows no bounds. I started thinking about possible food gifts that I could give this year for Christmas gifts and came across this recipe. I gave it a whirl and brought it into work for my guinea pigs to test. It has been an outstanding success. I created an office of addicts. Seriously. I've made three batches of it, with the batch last night being a double.


Here is the recipe I linked to above, with my notes:

Bacon Jam (this is the recipe for one batch...I usually just go ahead and make a double batch, which means just doubling everything below)

1 1/2 pounds bacon, sliced--two packs of bacon
1 large onion, diced (about 2 cups)--since I'm going to pulverize it later in the food processor, I save myself some time and just buy the frozen, pre-chopped onion in the grocery store.
3 medium cloves roasted garlic--here again, I try to save myself time, and I buy the Dorot brand frozen cubes of garlic at Trader Joe's. 
1/2 cup cider vinegar
1/2 cup packed dark brown sugar
1/4 cup maple syrup
6 tablespoons brewed coffee or postum
6 tablespoons bourbon

Line a baking sheet with foil. Arrange bacon slices on the foil and place the baking sheet on the center rack of a cold oven. Turn oven on to 400°F and allow to cook for 15-20 minutes, until bacon is golden brown. I just fry my bacon in a pan on the stove top. My oven is finicky and I'm more likely to burn the bacon in the oven than on the stovetop.

Transfer bacon to paper towels to drain. Reserve one tablespoon of fat, pouring into a skillet, and adding onions, sugar and garlic. Cook, stirring frequently, until onions are softened and translucent, about five minutes. Add vinegar, maple syrup, coffee or postum, and bourbon. Bring to a boil and cook for two minutes.

Transfer mixture and cooked bacon to a six-quart slow-cooker and cook on high, uncovered, until liquid has reduced and thickened slightly and bacon is a deep burnished brown, 3 1/2 to 4 hours. I usually stir it a few times while it's cooking. With the lid off, the bacon on top of the pile gets dry quickly so I stir it occasionally to keep the liquid distributed.

Transfer mixture to food processor and pulse until coarsely chopped. Let cool, then transfer to airtight jars. Store in refrigerator for up to one month. I've read, and experienced, that it keeps just fine in the fridge longer than that. I'd say at least three months, maybe longer.


It's certainly not the most inexpensive thing I've ever made. Bacon, especially 4 packs (for the double batch) isn't exactly cheap (hello $20 in bacon!!) but it's insanely good. It's smoky and sweet. Salty and a little tangy. It's perfection. And there are a thousand things to do with it, if you find you're not content with just eating it straight out of the jar. I think I found a winner!!

I made some cute little labels to play around with packaging. I still need to work on the lid cover. I like the parchment but it was kind of a pain to work with.

Wednesday, December 30, 2009

Handmade Holidays

This year, in an attempt to drive myself totally insane, I decided to try to make as many handmade gifts as possible. Please keep in mind when reading this, I have an infant who was born in September. So I'm hoping for Christmas 2010 to take all this up a notch, perhaps with the help of a little set of hands. He needs to work on that hand-eye coordination ASAP!
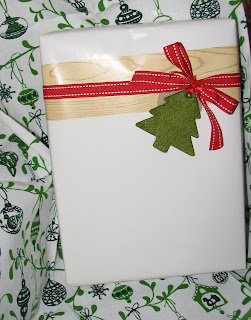
I did have time to have a little fun with gift wrapping. I played around with that faux-wood contact paper on a few gifts. It was really easy to do (I was worried the contact paper would be about as fun to wrangle as Saran-wrap).


I made food gifts and my husband made soaps for some out-of-town folks and also as smaller gifts to give friends, co-workers, and neighbors.
I made two types of holiday breads--Gingerbread and Orange Cranberry. The Orange Cranberry had dried cranberries inside and I sprinkled candied ginger on top of the gingerbread. I found some really cute mini loaf pans from Bake It Pretty . You make the bread right in the loaf "pan" and you end up with loaves that are a variation on a muffin-sized portion. I just wrapped the mini-loaves in decorative parchment paper and tied with baker's twine. For each package I sent two of each variety.

As you can find in the previous post, I started playing around with making chocolate bark back in the fall. I ended up making two types--White Chocolate with Cranberries and Milk Chocolate Smores. I used the Smores bark at a cookie exhange party but shipped the White Chocolate with Cranberries with the mini tea breads. I was a little worried the milk chocolate wouldn't hold up as well unrefrigerated for very long. I also got these cute little "cookie" boxes from Bake It Pretty.


My husband made a holiday collection of soaps, again this year. The soaps last year were a hit so we played around with a few different scents and then had fun with the packaging using some images and paper from Paper Source.


We did three scents for 2009, stacked them, and tied them with baker's twine.
Snow Day was a mocha/hot chocolate soap
Christmas Cookie was a vanilla and gingersnap scent
Winter Forest was a mix of juniper and blackerry scents


The only Sadie Priss projects I had time to make for the holidays were these really cute fabric flower cuff bracelets. I've really enjoyed wearing the red and black plaid one for the holidays and I think they'll be really cute for gifts again at Valentine's Day and also to wear around in the Spring and Summer.

Tuesday, November 3, 2009

Holiday gifts

So I did a fun little test run making candy bark--something I will likely give as Christmas gifts this year. I'm trying to work up a collection of candy and/or baked goods to send to some of my out-of-town relatives and other folks on my holiday list. I had lots of fun making this white chocolate bark. It's the best non-baking, baking project I've ever tried!!!

White chocolate with dark chocolate swirl, pecans and orange flavored cranberries. So the question is....I wonder how well it will ship. Hmmmm. The more important question is....how much fun am I going to have making cute little holiday packaging for this stuff!!! I think sometimes I make stuff just to have an excuse to play with packaging.

Saturday, September 5, 2009

Fun in Annapolis

We took a quick little afternoon trip down to Annapolis today and had more fun than expected. Living fairly close, we go down there pretty regularly but haven't had a chance to go into downtown in awhile. After an early dinner at Ram's Head Tavern we took a stroll down Main Street where I found two VERY Amy-tastic snack locations....The first was Nostalgia Cupcakes. I must say that I found these cupcakes to be much better than the ones I've had here in Baltimore at Charm City Cupcakes or Baltimore Cupcake. Perhaps it's a good thing I can't get a good cupcake very close to my house. Could be very dangerous.

Good things always come in boxes wrapped in bakers twine.

We got two of the Chocolate City, I got a red velvet, and Kirk got the peanut butter--to go.

For our more immediate after-dinner entertainment we went to Yofiore, a new fro-yo place in Annapolis. Of course it wasn't as good as the places I've been in NYC but still much better than the one fro-yo place located here in Baltimore.


I didn't take the photos below (you can find them here) but the store was very cute inside!