Showing posts with label cooking. Show all posts

Wednesday, January 25, 2012

2012: A Cake Odyssey

While looking for a new cooking or craft project to kick off the new year, I came across something that was the perfect combo of both crafts and cooking. The recipe for Momofuku Milk Bar's Birthday Cake in the Milk Bar cookbook by Christina Tosi (the pastry chef) that I picked up back in December. I purchased mine in NYC, but I've seen it at Barnes & Noble too. The recipe is intriguing for various reasons, like the use of (strange to me) ingredients like glucose and citric acid. I was most drawn to the challenge of creating a layer cake that you bake in a sheet pan, then cut out the layers, and stack them with the support of acetate sheets. Feeling scared? Think it's too complicated for you? It's not. And it's TOTALLY worth it. Every single minute of effort is SOOOOO worth it.


Because I work full-time and have a child, my free time is fairly limited. I tackled this cake project over two nights. Well...let me back up just a minute, maybe more than two nights. Before I started the cake, I had to get all of the ingredients and other supplies which involved more than just a trip to the grocery store. Most of the ingredients were basic stuff like eggs, butter, sugar, etc. However,  I didn't have cake flour, grapeseed oil,  glucose, citric acid, or clear vanilla. In the end, I picked up the glucose at a local cake decorating supply store (check the baking aisle at Michael's too). If glucose scares you, then you can substitute corn syrup (she notes this in the recipe). You can find cake flour and grapeseed oil  at most any grocery store. I had no luck finding clear vanilla (I just used my regular brown-colored vanilla) or citric acid, but will keep an eye out for those. I can't say that those two missing ingredients made one difference in the taste or appearance of the cake. I picked up the cake ring, a large round metal cookie-cutter looking thing, that you use to cut the cake layers out of the sheet pan, and then use to form the base of the cake, at Sur la Table. You can also order them on Amazon. I purchased a sheet of acetate (clear plastic) at the local art supply store and cut out two 3"x 20" strips. You can buy these plastic strips online, but for the cost of the strips and the shipping and the fact that this is not my business, it was easier to just go the art supply store route.

So, back to the cake. The cake is made up of four separate recipes: the crumb, the icing, the cake wash, and the actual cake. I made the crumb and the icing the first night. They were very simple and quick. After I made them, I put each in their own air-tight container and placed in the fridge. To use the next night. I think Christina Tosi notes that the icing will keep for a week in the fridge and the crumb up to a month in the freezer.

Birthday Cake crumb
Crumb straight out of the oven. It's perfectly sweet, salty, and crunchy.
The next night I baked the cake. It's a pretty standard recipe, but you really must follow her instructions carefully. If she says you need to let the mixer go for 8 minutes, then you need to make sure that happens. Same thing when she says only let it go for 30 seconds. The cookbook has a great introduction written by Tosi that lays out how she arrived at this job, these recipes, and her reasons why you need to do what she says. I figure she's a renown pastry chef in NYC, not me, so I was very careful to follow each recipe to the letter--which is something I rarely do.


Once the batter was ready, I spread it out on a parchment lined quarter-sheet pan. The recipe calls for sprinkles and you can use any color combos you want. I was making this around the time we were celebrating the Baltimore Ravens' football team in the playoffs, so I figured purple, black, and yellow sprinkles were appropriate.


Straight out of the oven.


Once the cake has cooled, you cut two of the three layers out with your cake ring.


You use the left over "scrap" cake to form the bottom layer of the cake.
So now that all the parts of the cake were ready, I could finally begin to assemble. This is where that fourth recipe comes in...the cake wash. It's just vanilla and milk, so that one's not complicated at all.

Here is my set up: I lined a regular 8" cake pan with parchment. Then I put the cake ring in the middle, and lined the ring with one of the two strips of acetate.
You form the bottom layer of the cake, as I mentioned, with the scrap left over from cutting out the other two layers. So I just pressed the scrap pieces of cake into the round until I had a layer that was flat and about the same thickness as the other layers.


Then I got all excited about assembling the cake and forgot to take photos! So after the bottom layer of cake is in place, you brush the wash over it, then a thin layer of icing, sprinkle some of the cake crumb, then another thin layer of icing.
This is the first layer, before you put the layer of icing on top of the crumb.
Then you put one of the cut-out cake layers in place, after you add the other strip of acetate.


Then you do the wash, the icing, the crumb, and the icing again. Place the last cake layer on top of that, do the wash, the rest of the icing, and place the remaining crumb all over the top, or just in the center (which is what I did). And you have this:


The cake then goes in the freezer for 12 hours (minimum) and can keep in the freezer, well wrapped, for 2 weeks. About three hours before you serve it, place it in the fridge to defrost. And viola!


I must say, that in the beginning I had doubts that all this effort would be worth it for a 6-inch cake (I manged to get 12 slices out of it, so it's share-able). I was wrong. Very, very wrong. It was definitely worth the effort and it's good to know that I can whip this thing out if I need to (with a little notice) for birthdays or any other reason. The cake has the texture of angel food cake, light and fluffy, but with the flavor of a perfect vanilla cake. I think the wash adds just the right amount of moisture. As I mentioned, the crumb is perfectly crunchy, salty, and sweet. The icing is divine! I would make the icing for use on any other cake. It's a combination of buttercream icing with a little cream cheese and a touch of sea salt. Put all of those things together...the light, moist cake with the sweet, salty crumb, sandwiched between the creamy icing and it's perfection. Tosi definitely knows what she is doing!

Since I don't want to be sued, I can't post the recipe here. But someone else did, so you can read that here. Or you can just buy the book. It provides recipes for almost everything they serve at Milk Bar. From compost cookies, blueberries and cream cookies, to their famous crack pie and cereal milk.

Wednesday, January 4, 2012

Cheers!

Happy 2012 everyone! Here's hoping that it's a fabulous year!

I'm not sure what this may indicate about the new year, but I'm going to go ahead and start this year's posts off with one about delicious alcoholic beverages.

I pinned the recipe for a Snowtini on Pinterest a few weeks ago, hoping I would get a chance to try it out over the holidays. Well, I did try it out. In fact, I tried out a whole pitcher of it on New Year's Eve and it was delicious. Next to bacon jam, this may be my new obsession.


Here is the original recipe, and my adjustments.

Snowtini
Makes 2
1/3 cup coconut cream (should be settled at the top of a can of coconut milk) 
¼ cup marshmallow creme--I used about half a jar, so probably more like 1/2 cup
3 tablespoons vanilla vodka--I doubled this because I didn't use the other alcohol the recipe calls for
3 tablespoons white chocolate liqueur--I couldn't find this in time for my New Year's Eve test run, but have it on hand now and I can't wait to use it next time!
2 tablespoons half and half--I just used milk I had in the fridge
1 miniature bottle of Malibu rum--I didn't use this and probably wouldn't. Unless you have it or just love it, you get plenty of coconut flavor from the coconut and the coconut cream
¼ cup coconut
2-3 tablespoons sugar--I omitted this, it was sweet enough with the marshmallow creme and coconut cream
1/8 teaspoon salt--also omitted this
Ice
1 package of Hostess Snoballs to garnish--I couldn't find these (but will look again next time I go to the store), so I used a powdered doughnut hole

Add all ingredients to blender and blend, Baby, blend!!!  Keep adding ice until you get a nice, slushy, snow-like consistency.  Garnish with Snoballs!


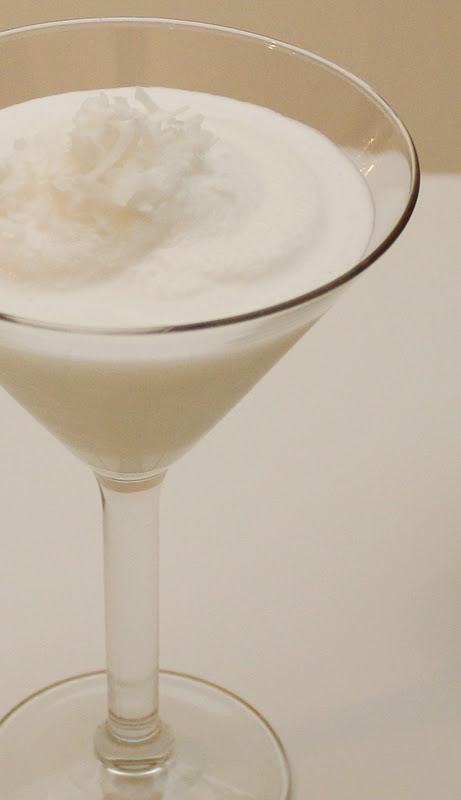
This is the BEST snow cream you will ever have! I sprinkled a little coconut on top for fun. And then I drank it ALLLLLLLL!!!!


I guess to counter the Snowtini, now would be a good time to share my favorite hot chocolate recipe. I have been obsessed for a very long time with replicating the hot chocolate at City Bakery in NYC. I've tried all kinds of recipes that promised they were the real deal, but they weren't. Not even close to the smooth, rich, and thick chocolate heaven that is City Bakery's hot chocolate.  And I'm not the only one obsessed with drinking their insane chocolate "soup"...there are tons of others (and here, and here are just a few) out there on the interwebs who feel the same way.

Photo from the Gothamist.
I wasn't even looking for it (in fact, I'd given up) when I saw Paula Deen's Work-a-holic Hot Chocolate recipe in a cookbook I own. I knew the recipe stood a chance when I realized you make vanilla custard and add chocolate to it...and I was right!!!  I know the thickness may be too much for some people, so when I made it at the holiday brunch, I added a little more milk just to thin it down a little (just a little...to me the charm is in its thickness). The night before the brunch (since I didn't want to be stuck at the stove making hot chocolate), I made three batches and put them in the fridge in air tight containers. Then, as guests wanted hot chocolate, I heated up half a batch at a time with a little milk so it wasn't quite as thick. I also had a little Godiva Chocolate Liqueur to add for those who were interested in kicking things up a notch!


Paula Deen's Work-a-holic's Hot Chocolate

Vanilla Custard:

  • 2 tablespoons cornstarch
  • 2 1/2 cups milk, divided
  • 1/2 cup sugar
  • 2 large egg yolks
  • 1 vanilla bean, split lengthwise, or 1 teaspoon vanilla extract

Hot chocolate:

  • 7 ounces (2 chocolate bars) semisweet chocolate, chopped--I used semi-sweet chocolate chips
  • 1 cup milk, boiled

Directions

Sprinkle the cornstarch over 1/2 cup of the milk in a small bowl and whisk to dissolve. Add the sugar and egg yolks and whisk well.
In a heavy-bottomed medium saucepan over low heat, bring the remaining 2 cups of the milk and the vanilla bean just to a simmer. Remove the bean, scrape the vanilla seeds into the milk, and discard the bean. Gradually whisk the egg yolk mixture into the milk.
Cook, whisking often, until the sauce comes to a full boil, about 3 minutes. If using vanilla extract, stir it in now. Strain through a wire sieve into a bowl. Serve warm.
Add to the vanilla cream the chopped chocolate chunks and a boiled cup of milk. Mix until smooth. Any flavor can be added- raspberry, cinnamon, holiday ginger spice, marshmallows. The semi-sweet chocolate can be substituted with milk or white chocolate

And I guess I should go ahead and warn everyone that I received 9 cookbooks for Christmas this year. NINE! Until I can come up with a new craft project or decide to redecorate a room, there's going to be lots of cooking. So for my co-workers who read this...you've been warned. Start doing your extra sit-ups now!

Tuesday, November 22, 2011

New Thanksgiving Traditions

With only a few days to go, I thought I would share some of the fun Thanksgiving ideas I've found on Pinterest, in case you find yourself with tons of time on your hands and wish to take on a new recipe or two, and maybe even a craft project!

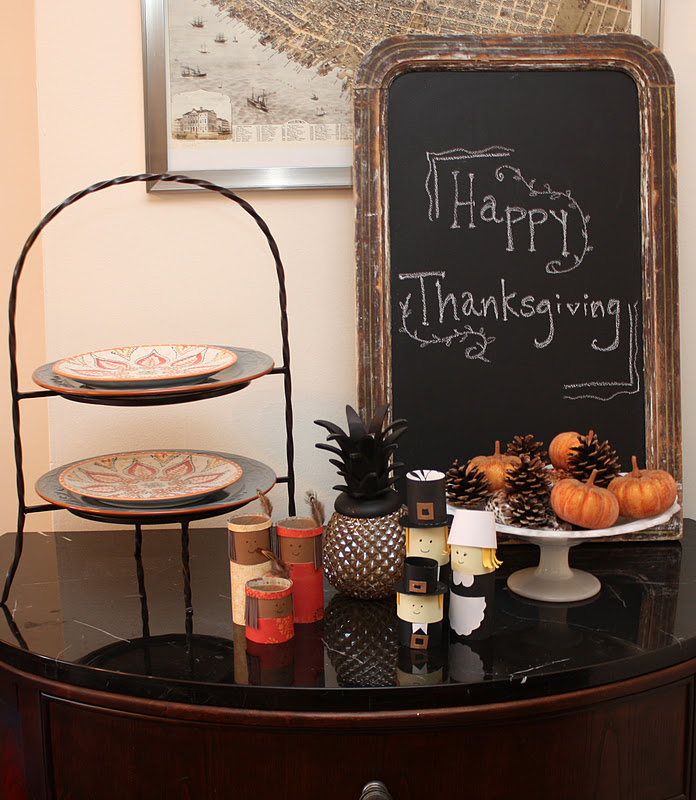
My decoration is minimal this year. I've stuck to neutrals and used my velvet pumpkins, pine cones, and candles for my centerpiece.


With my little guy, slightly more aware of holidays this year, I thought I should try to incorporate something into the decor for him (and that he can play with too).

I found the idea for the Pilgrims and Indians, shown above, on Pinterest.


They were really easy to make. I just collected toliet paper cores (you could use paper towel cores too). For the set above I used four toliet paper cores for the adults and cut one core in half for the child. I just wrapped the cores in scrapbook paper, hot gluing it onto the cardboard core. I just drew the faces on with a Sharpie marker. And I just sort of winged it with the hats for the pilgrims. I figure these things are likely to last about 3 minutes in the hands of my 2 year old, so I didn't feel the need to spend too much time on them.

Now, on to more important things....alcoholic beverages. Check out this delicious holiday beverage that you could serve hot or cold.


Another Pinterest find, I followed this recipe for the Apple, Ginger, and Cranberry Vodka Cocktail. I had vanilla vodka at home so I used that and it was fantastic. When that runs out I'll probably be making these with bourbon. I'm planning to drink them all day long.

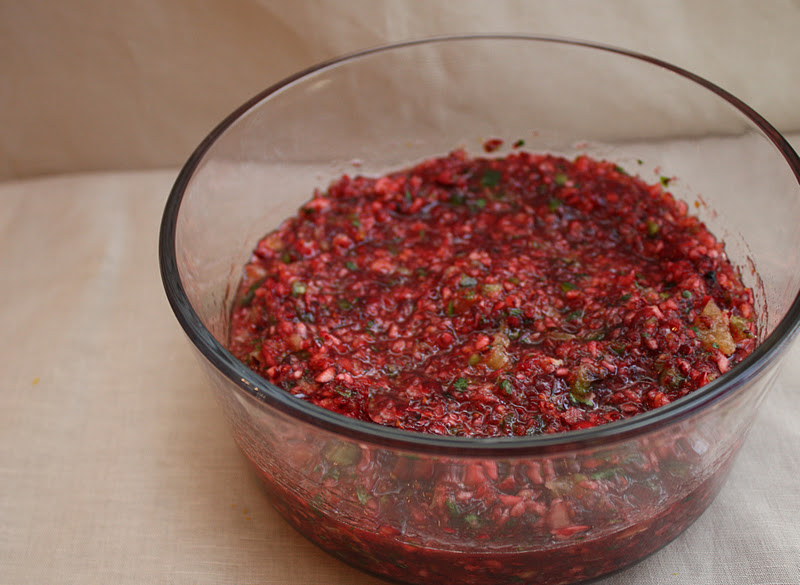
Finally, I have fallen in love with this recipe for Cranberry Salsa from the November 2011 issue of Southern Living. Is this the prettiest salsa you've ever seen or what???


The recipe is very simple. Rise a bag of cranberries. Cut up a navel orange (zest it beforehand), then coarsely chop candied ginger.


Also chop 2 jalapenos, and some cilantro (the orange zest is in the middle below).


Throw the cranberries in your food processor until they're nicely chopped and look like this:


Place the chopped cranberries in a bowl. Next, put the other pre-chopped ingredients with a cup of sugar into the empty food processor until they're finely chopped and blended together. Stir them into the cranberries and voila! You're done! Leave in the fridge at least 2 hours, or overnight, and enjoy with tortilla chips (or anything else you desire to dip into it).


I hope you have a fantastic Thanksgiving!!!

Tuesday, November 8, 2011

Whoopie!

Whoopie pies are the new black. I'm pretty sure of this. They may even be the new cupcake. They're everywhere and I'm pretty sure they can't be stopped. I've never made them before and thought maybe I should. I mean, we are pretty close to Lancaster, PA, and those Amish folks do claim the whoopie pie as their own.

Thanks to the awesomeness that is Pinterest, I found a link for Pumpkin and Maple Cream Cheese Whoopie Pies recipe here.

I must say, that not only did they taste fantastic, they turned out much prettier than I ever imagined!!!

I followed the recipe this time with only a few minor changes. I doubled the amount of spices (the cinnamon and ginger) and was pleased with the result. The cookies would have been bland (to me) had I not made that adjustment. My readers who tasted them can weigh in on that in the comment section!


I used my small cookie scoop to put the dough on the pans. I knew using this method was the only way I stood a chance of getting cookies the same size. I just hoped it would also result in cookies with a rounded shape. Also, whenever I bake cookies, I ALWAYS use my Pampered Chef baking stones. ALWAYS. If I had Silpat Cookie Sheet Liners I'd use those, but with the issues I have with my oven, I can't use a straight cookie sheet.


It worked!

Once I saw that the cookies looked perfect, I wanted to make sure I didn't make the filling look messy. So before I squished the two cookies together with the filling in the middle, I sort of formed it onto one cookie and smoothed the sides a bit. Then pressed the two together so the filling then just spread out in the formed shape.

Ta da!

I would absolutely make these again!
In other, non-whoopie pie related news, I thought I'd share a little cinematic masterpiece created by my friend, Candy's husband, who is obviously a skilled filmmaker.

I bet you'll never guess which phone is me!


Tuesday, November 1, 2011

Party like it's 1802

I picked up The Bucolic Plague (the book, not a disease) at the library not intending to enjoy it. I take that back. It wasn't that I was planning to read something I thought would bore me to tears, it's just that given the subject matter and the title, I just figured it was long-winded story of how you, too, can be a better person by buying and running an organic farm. I loved the book! Yeah, it has undertones of the trials and tribulations one may encounter when embarking on the task of becoming a gentleman farmer, but it is really a very well written and quite funny story of real life on a small farm.

I remember seeing the book in my local Williams-Sonoma back in the spring. Then earlier this week the Beekman Farm popped back on my radar when I was glancing through the recent issue of Country Living.  The Fabulous Beekman Boys are two guys from Manhattan who purchase a farm in upstate New York, and then commit to bringing the run-down farm and house (built in 1802) back to life. The book turned out to be very funny, regardless of whether or not you care about such things as heirloom plants or organic farming or killing your first Thanksgiving turkey with your bare hands. I really loved the tidbits that were planted throughout the book, which provide an insider's glimpse into the "real" Martha Stewart  (Brent Ridge, one of the two men, is a former Martha Stewart Omnimedia employee). I will spare you of my lame attempt to highlight some of the humor and the charming tales of life down on the Beekman Farm, but it's worth your while to read an excerpt of the book here. Farming eventually lead Josh and Brent to develop a very Martha-style omnimedia empire, developing a lifestyle brand called Beekman 1802 which includes the website, books, blogs, forums, and a TV show.

Beekman 1802 
The Fabulous Beekman Boys have recently released a cookbook of  heirloom recipes, The Beekman 1802 Heirloom Cookbook. The recipes focus on using heirloom produce and organic ingredients, giving home-cooking a 21st century farmhouse spin. And, just in time for Thanksgiving, some of their recipes were featured in this month's (November 2011) issue of Country Living magazine.


One of the recipes featured in the magazine was a Honey Apple Pie with Rosemary. I love rosemary and I love apple pie, so I thought I'd give it a whirl. Since the recipe isn't posted on the Beekman site or the Country Living site, I can't (unless I want to get in sued) post the recipe here. After a little "internet research" I found that their recipe was VERY similar to this recipe (which I can post and link to since it's already been posted):

Honey Apple Pie with Thyme originally posted back in 2006 in the New York Times.


3 golden delicious apples, peeled and cored
4 granny smith apples, peeled and cored
1/2 cup honey
6 thyme branches
1/2 cup unsalted butter cut into small pieces
2 T instant tapioca
1/3 c light brown sugar
1/2 t ground ginger
1/4 t salt
flour for dusting
dough for 2 9 inch pie crusts.


1. Preheat oven to 425 degrees. Slice Golden Delicious apples and 3 granny smith apples into sixths.
2. In a large skillet over medium-high heat, bring 14 cup honey to a boil. Let simmer about 2 minutes, until honey is caramelized. Add 3 thyme branches. Arrange half the apples in a single layer in skillet. Sprinkle 2 tablespoons butter over apples. Cook apples, turning until well caramelized on all sides, but not cooked through, about ten minutes. Scrape apples and honey mixture into a bowl. Add tapioca and toss to combine. Repeat cooking process with remaining honey, thyme, butter and sliced apples. Add a second batch of apples to bowl, combine. Discard all thyme branches.
3. thinly slice remaining granny smith apple and add it to bowl. Stir in sugar, ginger and salt
4. On a lightly floured surface roll out both crusts to a 12 inch circle. Place one crust in 9 inch pie plate. Scrape apple filling into crust and top with remaining crusts.
5. Bake for 15 minutes, reduce heat to 350 and continue baking about 45 min. Let cool for 30 minutes before slicing.

So, taking that recipe, here are my changes to make a Honey and Rosemary Apple Pie...

Crust
I didn't make the crust. If you want to make a pie crust and have time, go for it. I used a store-bought crust.

Pie Filling (this is enough to make one deep dish 9 inch pie or two regular 9 inch pies)

4 Granny Smith apples, peeled, cored, sliced
4 Honey Crisp apples, peeled, cored, sliced
1 cup light brown sugar
2 teaspoons cinnamon
1 teaspoon ground nutmeg
½ teaspoon ground cloves
2 teaspoons finely chopped fresh rosemary (I will probably use 3-4 teaspoons of rosemary next time...it wasn't rosemary-enough for me)
3 tablespoons instant tapioca
½ cup honey
2 tablespoons butter
1 large egg, lightly beaten with 1 teaspoon water (this is the egg wash for the top of the crust)
Cinnamon and sugar (for sprinkling top of pie crust)


In a bowl, combine apples with brown sugar, spices, and tapioca.  


Add honey and stir until combined.


Preheat oven to 400. Place crust in 9 inch pie pan. Add pie filling to pan. And dot with 2 tablespoons of butter (not melted).

Place second crust over top of pie. I have a leaf-shaped cookie cutter that I like to use to cut out the crust for the top of the pie.

Brush egg wash over crust, sprinkle with cinnamon and sugar.


Bake pie on middle rack of oven .After 20 minutes remove pie and cover edge of crust with foil. Continue to bake until juices are bubbling 50 minutes more. Cool on wire rack.


The pie was fantastic! I loved the addition of rosemary, even if it wasn't enough rosemary for me. I'll play with it on the second try to see if I can add more rosemary without over-doing it.

Thursday, October 27, 2011

Street food

The street food trend just keeps growing. Everywhere I go, or look, there is news of a new food truck or a restaurant specializing in street food. Over the weekend, I went to Paladar in the Annapolis Towne Centre at Parole (primarily because there was a sign advertising a Rum Bar and I've had a cold and sore throat for over 4 days now and rum seemed appealing).

A dark and stormy should fix things!

The restaurant has a happy hour menu that features "Latin street food"...which is sort of a mix of all kinds of things that may not be actual "street food", but it's cute that they're catering to a trend. The black bean empanadas I had, along with an entire bowl of gucamole, were delish!

So on this topic of being surrounded by "street food" wherever I seem to go, I was in The Fresh Market recently and spotted this:

Lucini Cinque e' Cinque
Now even the pasta companies are joining the bandwagon. It sounded intriguing so I thought I'd give it a whirl. I've had other products by Lucini and they were all very good, so I figured this wouldn't be a bust. Of course, I first had to Google the word farinata to see what exactly I  purchased. It was described as a flat bread made of chickpea flour and is common in Italy, as well as southern France (where it is called socca). And as a logical next step, I searched Pinterest for posts containing the word farinata or socca. Most of the recipes used the baked farinata as a base for creating a sauce-less pizza.

This is what I did with mine:

Just one quick not about preparing the farinata...the directions have you placing the pan (I used a round metal cookie/pizza pan--with sides) in the oven first and then while it's hot pour the batter into the pan. Be very careful doing this. The directions don't mention that you might burn yourself as the batter sizzles when it hits the very hot pan. And make sure you pull the hot pan out of the oven and place it on a flat heat-resistant surface.

So here it is straight out of the oven (ignore the burned edges on the far side of the pan, we can blame that on my oven/me chasing a toddler around while it was baking and not being good about checking the oven). While it was baking I lightly sauteed a zucchini and some sun-dried tomatoes with pancetta.


Then I topped my farinata with the veggies, sprinkled it with parmesan cheese, and fresh ground black pepper (which was suggested in other recipes and on the package).

Very tasty and apparently good for you too!


Definitely give it a try if you spot it at the grocery store. The Fresh Market carried the rosemary (which I used) and a traditional variety, but a fiery Tuscan chili option is listed on the website. Buon appetito!