Showing posts with label crafts. Show all posts

Tuesday, November 29, 2011

Small Things

I just thought I'd share a few DIY Christmas gift projects I worked on over the weekend. These are fairly simple and inexpensive crafts that make great gifts for the holidays!

Clay Gift Tags

I haven't tried anything with clay (of the earthen or polymer varieties) since an art class in college. I'm not so good with modeling clay into something like an animal or a specific shape. I'm lacking that gene along with the ability-to-do-math-gene. I CAN roll clay out flat and cut it with a cookie cutter and stamp it with something. Like a cookie! Oh yes, I know about cookies!!!! Following this tutorial, you too can make these cute little tags that you can use for gifts or ornaments (or gift tags that are ornaments!).

I just purchased two blocks of white Sculpey polymer clay. I pulled out other things I have my craft supplies like stamps, ink pads, paint (not pictured), clay tools. 
I bought a cookie sheet at the Dollar Tree that I could use only for the purpose of baking this clay. You don't want to place it on a surface that you would ever place food. The same rule applies for the tools you use. I cut mine out with a set of round fondant cutters I found in the cake decorating aisle at Michael's. I used craft stamps for the initials and other decorative elements on the tags, and a straw cuts out a perfect hole for ribbon to tie them onto a package or to hang.

After baking.
Once they cooled, I decided to use paint (same technique as the tutorial), to add a little dimension to the tags. Using very little paint on a dry brush, I filled in the impression left by the stamp, and then with a dry towel wiped away the excess.


I used silver jump rings that you use in jewelry making, to make it easier to attach ribbon to the top. This is totally optional because you could run the ribbon through the hole with no problem.


Girls' Headbands and Hats

This is a project I just made up as I went along. I need a few gifts for little girls and thought I could use some things I already have to embellish store bought hats and headbands. I snagged the hats and headbands at Walmart. The hats were about $1.30 and the headbands were four for about $3.


I pulled the bow and pink flower off the headbands and then attached leftover rolled-rose flowers I made a year ago for another project.You can find a tutorial for making the flowers here.

I also pulled out some feathers and the feathery yarn shown at the top of this photo. 
I wrapped the feathery yarn around the side of one of the headbands. I just glued it on either end to the headbands.

Then glued the flower on top of that.


I did the same for these:


For the hats, I sewed the rolled roses, in groups of three, directly onto the hats. I put a small piece of dark pink felt on the back side of the roses (inside the hat) and pulled my stitches from the roses, through the hat, and then through the felt so the stitches wouldn't pop through the woven fabric.


And that was it! Some very cute gifts that only took a little bit of time, but I hope they'll be looking very cute on a few little girls this holiday season.

Tuesday, November 22, 2011

New Thanksgiving Traditions

With only a few days to go, I thought I would share some of the fun Thanksgiving ideas I've found on Pinterest, in case you find yourself with tons of time on your hands and wish to take on a new recipe or two, and maybe even a craft project!

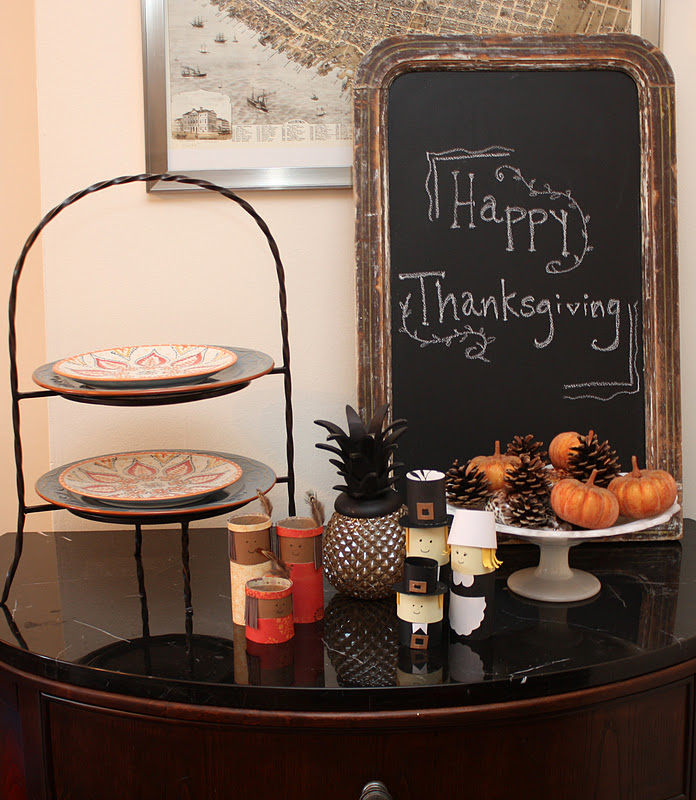
My decoration is minimal this year. I've stuck to neutrals and used my velvet pumpkins, pine cones, and candles for my centerpiece.


With my little guy, slightly more aware of holidays this year, I thought I should try to incorporate something into the decor for him (and that he can play with too).

I found the idea for the Pilgrims and Indians, shown above, on Pinterest.


They were really easy to make. I just collected toliet paper cores (you could use paper towel cores too). For the set above I used four toliet paper cores for the adults and cut one core in half for the child. I just wrapped the cores in scrapbook paper, hot gluing it onto the cardboard core. I just drew the faces on with a Sharpie marker. And I just sort of winged it with the hats for the pilgrims. I figure these things are likely to last about 3 minutes in the hands of my 2 year old, so I didn't feel the need to spend too much time on them.

Now, on to more important things....alcoholic beverages. Check out this delicious holiday beverage that you could serve hot or cold.


Another Pinterest find, I followed this recipe for the Apple, Ginger, and Cranberry Vodka Cocktail. I had vanilla vodka at home so I used that and it was fantastic. When that runs out I'll probably be making these with bourbon. I'm planning to drink them all day long.

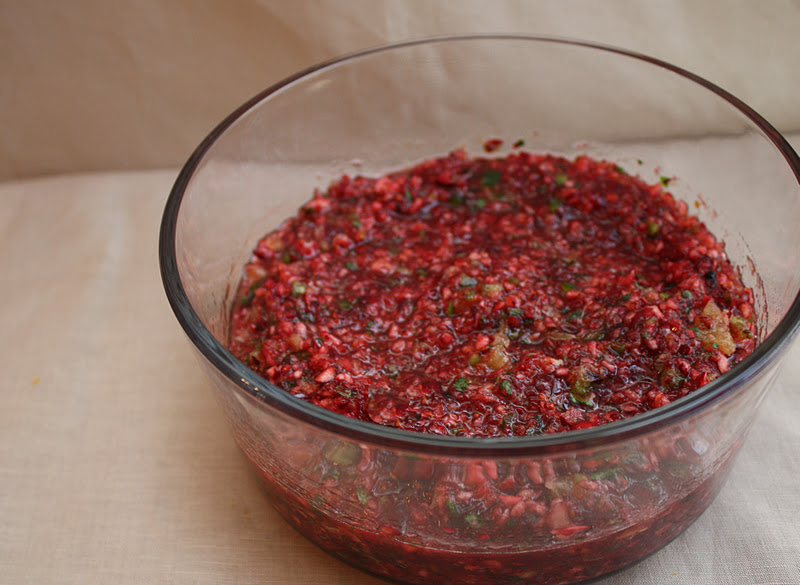
Finally, I have fallen in love with this recipe for Cranberry Salsa from the November 2011 issue of Southern Living. Is this the prettiest salsa you've ever seen or what???


The recipe is very simple. Rise a bag of cranberries. Cut up a navel orange (zest it beforehand), then coarsely chop candied ginger.


Also chop 2 jalapenos, and some cilantro (the orange zest is in the middle below).


Throw the cranberries in your food processor until they're nicely chopped and look like this:


Place the chopped cranberries in a bowl. Next, put the other pre-chopped ingredients with a cup of sugar into the empty food processor until they're finely chopped and blended together. Stir them into the cranberries and voila! You're done! Leave in the fridge at least 2 hours, or overnight, and enjoy with tortilla chips (or anything else you desire to dip into it).


I hope you have a fantastic Thanksgiving!!!

Thursday, November 17, 2011

Pottery Barn-inspired Winter Wreath

Now that Halloween is over it's time to get in high gear for the holidays, so November is my prime holiday crafting time. If possible, I generally prefer to have all of my holiday-related crafting done before Thanksgiving. It helps with the whole "sanity" front I try to maintain. If I could, I'd do all my holiday cooking in July and my crafting in March. I like to enjoy the time from Thanksgiving through New Year's Eve. I actually enjoy Christmas music and decorations, going to holiday parties, wrapping gifts, and watching all the random Christmas movies on TV. I'm glad that Pottery Barn had their holiday catalog out before Halloween this year. It was very considerate of them to take my crafting insanity schedule into account. I was just flipping through the catalog when I saw this wreath:

Pottery Barn Jeweled Crystal Wreath
So pretty!!!!


And for only $70 you can have a 13-inch one! Hmmm. Yeah, I think not. I'm pretty sure I can make that for less than $70.

This wreath really appeals to me (in addition to being GORGEOUS) because of its neutral color and theme. I usually go with seasonal wreaths, in lieu of holiday wreaths, on my front door. So my winter wreath goes up from the day after Thanksgiving through the end of February.

So, in order to make some gorgeousness happen on my front door for less than $70, this is what I did:

I bought a wreath form at Michael's. I should have measured it, but I think it's about 14-inches or so.


Then I took it apart.

Using wire cutters, I just clipped off the inside wire ring and the outside wire ring. It was pretty easy because they were held by wire pieces that were just bent around them.


And painted it.
Well, I didn't actually "paint" it. I started this project and then realized I used all my silver spray paint on the curtain rods in my bedroom. So I found a silver Sharpie and used that. I just wanted to make sure that the front of the wire was silver, and not green, in case it would show through the snowflakes once they were attached.
For the snowflakes, I just went in search of ornaments. Knowing I would need about 12 (I ended up using 11), I tried to find snowflake ornaments that didn't cost a fortune. I was hoping that I wouldn't have to post about my $70 Pottery Barn-inspired wreath, which cost only $100.


The silver starburst ornaments at the top are from Dollar Tree. The snowflake ornaments in the middle are from Crate & Barrel (they were too cute to pass up) and were $3. And the metal snowflakes on the bottom are from Target. I think they were $2. So for the ornaments, about $25 or less. The wire wreath form was about $3 (I had a coupon). I can safely say, I made this wreath for less than $30.

After removing all the tags and string or ribbon from the ornaments, I hot glued them to my wreath form. I also used thin gauge floral wire to wire them securely to the wreath form. Since they were oddly shaped and they weren't being glued to a flat, wide surface, I felt that reinforcing them with a little wire wasn't a bad idea. So about 10 minutes later, I had this:


My wreath isn't as delicate as the original Pottery Barn inspiration. I had a hard time finding beaded snowflake ornaments that were less than $6 each. So, I just decided to select ones that I liked, within my wreath budget (trying not to go over $30). Right before I made the wreath, I got the new West Elm holiday catalog in the mail, and I think that may have led to my more mod-style ornament selection. I'm in love with those starburst ornaments and thankfully they had those babies at the Dollar Tree!

Here she is on my front door!

Tuesday, November 15, 2011

Socky the Snowman

For the holidays this year, it looks like most of my gifts are going to be food-related. Specifically, it looks like I'm going to be making a TON of bacon jam. Unfortunately, while bacon jam will keep in the fridge for a few months, it's not something I'm ready to start making in mass quantities just yet. I only have a few other gifts to make for people who would really prefer I give them something handmade than store-bought. So, on pinterest (of course), I saw these:


They're not the usual Sadie Priss-sort of craft, but it's a gift for someone else. Someone who collects snowmen. And the tutorial (which is very easy to follow) is here. So this is what I did, to end up with these in less than an hour...


Following the tutorial, I bought cheap white men's socks at Walmart and two pairs of cute ankle socks ($1.50 each) at Target.


To make one snowman, I cut one white sock and each of the blue socks (per instructions in the tutorial). I did this same thing to make the snowman with the gray sweater and hat.

The white sock is the body, the sock that is open at both ends is the sweater, and the sock with just the heel cut off is the hat.

I did sew the end closed (this step wasn't in the tutorial but I had a hard time trusting that the rubber band would hold all that rice FOREVER), and then wrapped it with the rubber band to hold it tight.


Filled it with rice, then held the top together with a rubber band, and then also stitched the top closed. Obviously, I have trust issues with rubber bands.


I added one sock to the body as a little snowman sweater, and the other as a hat. And tied with string, as directed.


I added (with hot glue) tiny black buttons for eyes and a few buttons down the front of the "sweater". I also colored the end of a bbq skewer with a orange marker and glued it on for the "carrot" nose.  And just to be safe, I hot glued the hat onto the head of the snowman. It fits pretty tightly, but I will have to eventually ship these boogers so a little hot glue never hurts!


The blue is cute but that gray one is my favorite!


Thursday, November 10, 2011

Windows 2.0

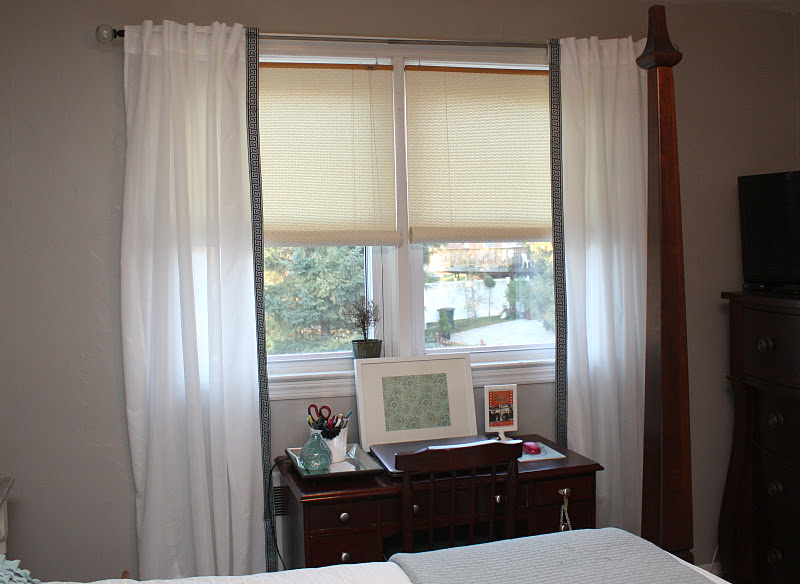
As I mentioned a few days ago, on my master bedroom update post, the curtains were a partially completed project. I bought them, I unpacked them, and then I hung them with no ironing or hemming, knowing that an upgrade was going to happen immediately.

All wrinkly and blah.
Back when I was pinning things like a crazy person for changing up things in the dining room, I kept pinning photos of lovely neutral curtains with a little trim along one or both sides of the panels.


Before I started searching the internet for trim, I thought I'd check the local Joann's Fabric trim section especially since I had a 40% off coupon. I was thrilled to find that not only did they have a nice wide greek key-patterned trim, but it was in colors that would work in my new bedroom!

A silver-y aqua greek key on a chocolate brown background.

I needed 6 yards, so with the coupon, I got the trim for $23. I grabbed a little Stitch Witchery too (iron-on fusible webbing tape that you use to bond two pieces of fabric together), with a plan to iron that gorgeousness straight onto the curtains I bought at Ikea.

First, I had to hem the curtains. I wanted them a little long and to pool on the floor, so I just folded up the bottom of the panels about half an inch or so. I used the hemming without sewing (unless you want to) method, also outlined here. And here. The curtains from Ikea come pre-packaged with enough Stitch Witchery tape to hem each panel.


To attach the greek-key trim, I just ran two strips of the fusible tape (since I couldn't find the tape in a width that matched the width of the trim) along the inside edge of the panel.


Then, working in about 2-foot sections at a time, I held the trim in place while I slowly applied heat with my iron until it bonded. The trim is woven and a little thicker than ribbon or cotton fabric, so it took a few passes with the iron and a little pressure to get it to stick to the curtain. For the ends, I just let about two inches of the trim hang off the top and bottom of the panel until I was done applying the trim along the side of the panel. Once I was done with that, I turned the panel over, folding over the trim, and ironing to the back side using the fusible tape just as I did along the front.


It took about an hour and a half to do both panels, but that includes hemming the bottom and then ironing the curtains after the trim was attached. It was worth it! For about $40 I have these:


So dreamy...