A few months ago at a VERY good sale at the Ann Taylor Loft Outlet, I picked up this really cute ribbon and bead necklace. I love to wear it and get tons of complements on it. So I decided I would like it different colors (this was the only color option given the sale situation) and maybe I could make some for Christmas gifts (you need something to wear when you're eating the bacon jam you'll also be getting from me for Christmas).
So for the test run, I just wanted to use materials that I already had on hand. So I went with black ribbon and a mix of black beads. I liked the tone on tone effect of the original, but I could also see it transforming into something with fall jewel tones...a teal ribbon...amethyst and amber beads, etc. So, cut two pieces of standard satin ribbon. One about 40 inches and one about 38 inches.
Then you'll need standard jewelry making tools like a pair of wire cutters and small nosed pliers.
Copying the original, you need 18 sets of three bead clusters. One large bead and two small. You need to run a head pin through each, and then make a loop at the top. I'm not going to do the math to figure out how many of those loops I had to make.
Then start putting your beads on the ribbon, starting in the middle of each section (you want 9 groups of beads on each ribbon piece). So tie a knot, add three beads, tie another knot. Then space the bead groups out every two inches. This part of the process goes really quickly.
Pretty soon you have two strands that look like this:
Now for the hard part. This is the part where I just made things up as I went along. I put my two sections of beaded ribbon together and pulled the tails of each through a larger bead. Keeping those tails (not cutting yet) loose, I took two more sections of ribbon (which make the part of the necklace that goes around your neck) that I cut 18 inches long and pulled them through those large beads in the opposite direction of tails of the beaded strands.I then knotted the tails of the beaded pieces and trimmed them. And then knotted the tails of the neck pieces and trimmed them.
 |
| You have a knot on the bottom side of the large bead from the two sections of ribbon that go around your neck. The knot on the top side of the bead is from the two sections of ribbon that are beaded. |
And here is my finished project next to the original. Looks lovely!
 |
| The necklaces are about 19 inches long. The beaded section is 12 inches long. |
 |
| Not the most glamorous shot, but I wanted to give you an idea of what it looks like on. |




 This year, in an attempt to drive myself totally insane, I decided to try to make as many handmade gifts as possible. Please keep in mind when reading this, I have an infant who was born in September. So I'm hoping for Christmas 2010 to take all this up a notch, perhaps with the help of a little set of hands. He needs to work on that hand-eye coordination ASAP!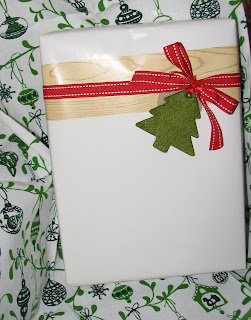
 I made food gifts and my husband made soaps for some out-of-town folks and also as smaller gifts to give friends, co-workers, and neighbors.
 I made two types of holiday breads--Gingerbread and Orange Cranberry. The Orange Cranberry had dried cranberries inside and I sprinkled candied ginger on top of the gingerbread. I found some really cute mini loaf pans from

 As you can find in the previous post, I started playing around with making chocolate bark back in the fall. I ended up making two types--White Chocolate with Cranberries and Milk Chocolate Smores. I used the Smores bark at a cookie exhange party but shipped the White Chocolate with Cranberries with the mini tea breads. I was a little worried the milk chocolate wouldn't hold up as well unrefrigerated for very long. I also got these cute little "cookie" boxes from


