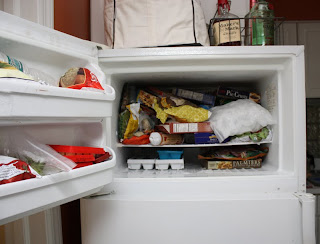
Thanks to Pinterest I came across this really awesome blog: I Heart Organizing. Thanks to the husband subjecting me to too many episodes of Hoarders, and our house being a bit disheveled after the power outage from Tropical Storm Irene, I went a little bonkers. So with a little inspiration here and here, I got to work. So this is our fridge and freezer right after the power came back on. It's more than a wreck. It's a disaster. It's probably the worst it has ever been. It looks like my mother's fridge!!!!!!!! Nooooo!!!!!
I ran to Target at lunch and found these bins, which are similar to the ones on the I Heart Organizing blog (she got hers at The Container Store...and I don't have time to wait for shipping...did you see that mess in those two previous photos???????)
I made some little labels to tape on the front of the bins. Nothing fancy.
And then I made it happen. All that stuff in the earlier photo is still in the freezer. I didn't throw out anything. And those little bins just slide right out, like a drawer. I LOOOOVE them.
 |
| GORGEOUS! |
I used the two smaller trays up top for small jars. One for jelly and peanut butter, one for things like salsa. And I must say, this whole system is awesome! You pull those bins or trays out just like you would a drawer, which means you can see what is behind something with minimal effort. This is a HUGE development. It could be an end to MALE REFRIGERATOR BLINDNESS!!!!!
Now, on to the other small project...
I have been wanting to paint this bookcase in my living room forever. And then, thanks to Pinterest, I keep seeing cute projects where you paint the bookcase one color and inside another color. Or you add fabric or wallpaper to the inside. My only hold up on this project has been the fact that I think I may end up using this bookcase in Henry's room in the near future and I'm thinking that I need it to retain the wood stain. So just to play around, I thought I'd just play around with the inside of the bookcase and not mess with painting until I know for sure what the future of Henry's room may hold.
 |
| It's that bookcase in the corner on the left. Nothing exciting really. |
 |
| And I'm loving the chevron-esque/herringbone pattern. |
 |
| Can you see it? It's nearly impossible to get a good indoor photo when it's dark outside and raining. |
 |
| It would look so cute painted a fun color! |


No comments:
Post a Comment